Heute vergleichen wir 5 verschiedene Schrittmotortreiber in verschiedenen Preiskategorien und Qualitätsstufen.
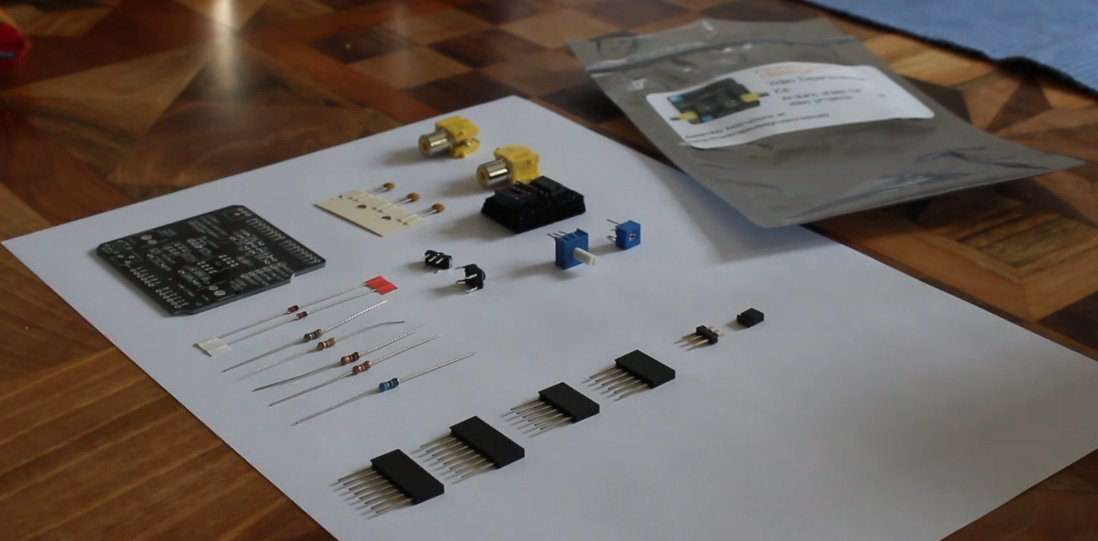
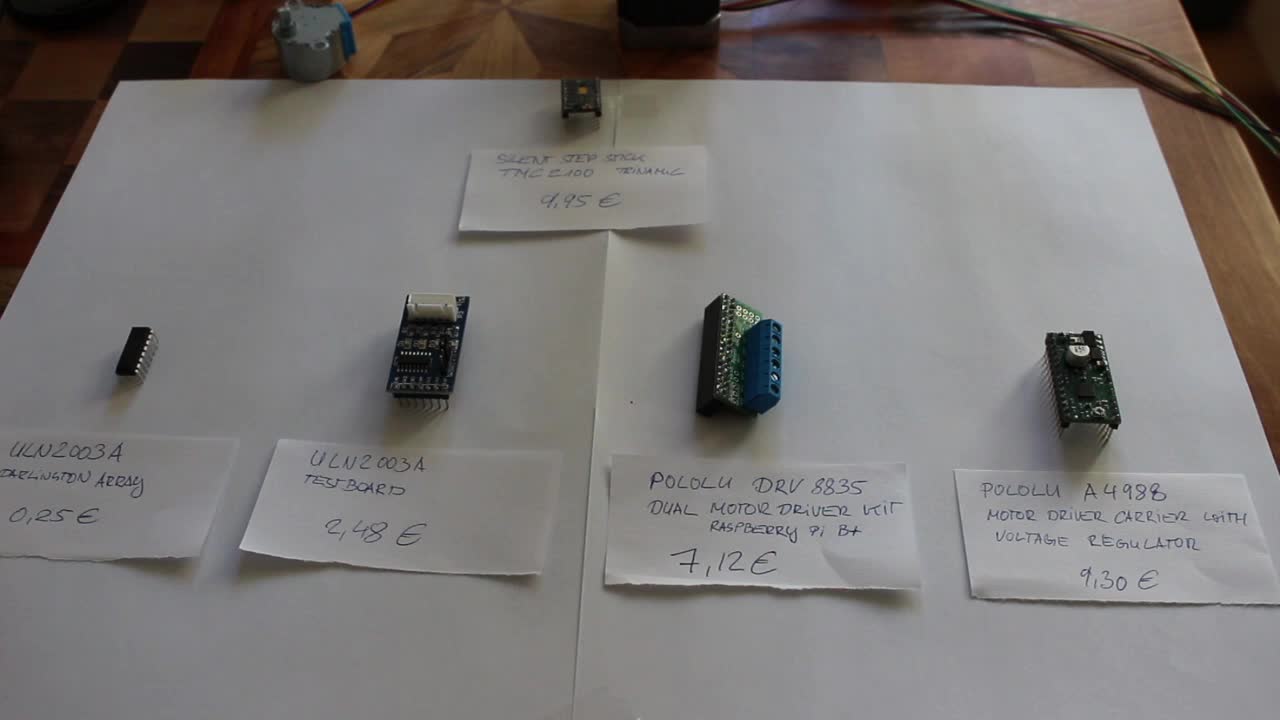
1. ULN2003A https://en.wikipedia.org/wiki/ULN2003A
2. ULN2003A testboard https://arduino-info.wikispaces.com/SmallSteppers
3. Pololu DRV 8835 https://www.pololu.com/product/2753
4. Pololu A4988 https://www.pololu.com/product/1183
5. Silent Step Stick auf Basis des TMC 2100 von Trinamic https://de.aliexpress.com/wholesale?catId=0&initiative_id=SB_20200823032152&SearchText=tmc2100
1. + 2. = Einsteiger
3. + 4. = Fortgeschritten
5. = Profi
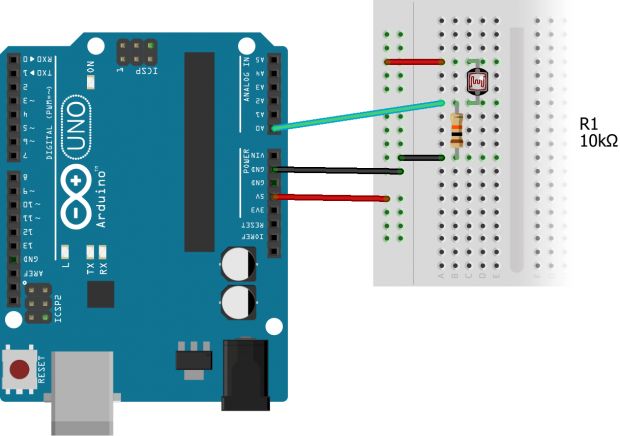
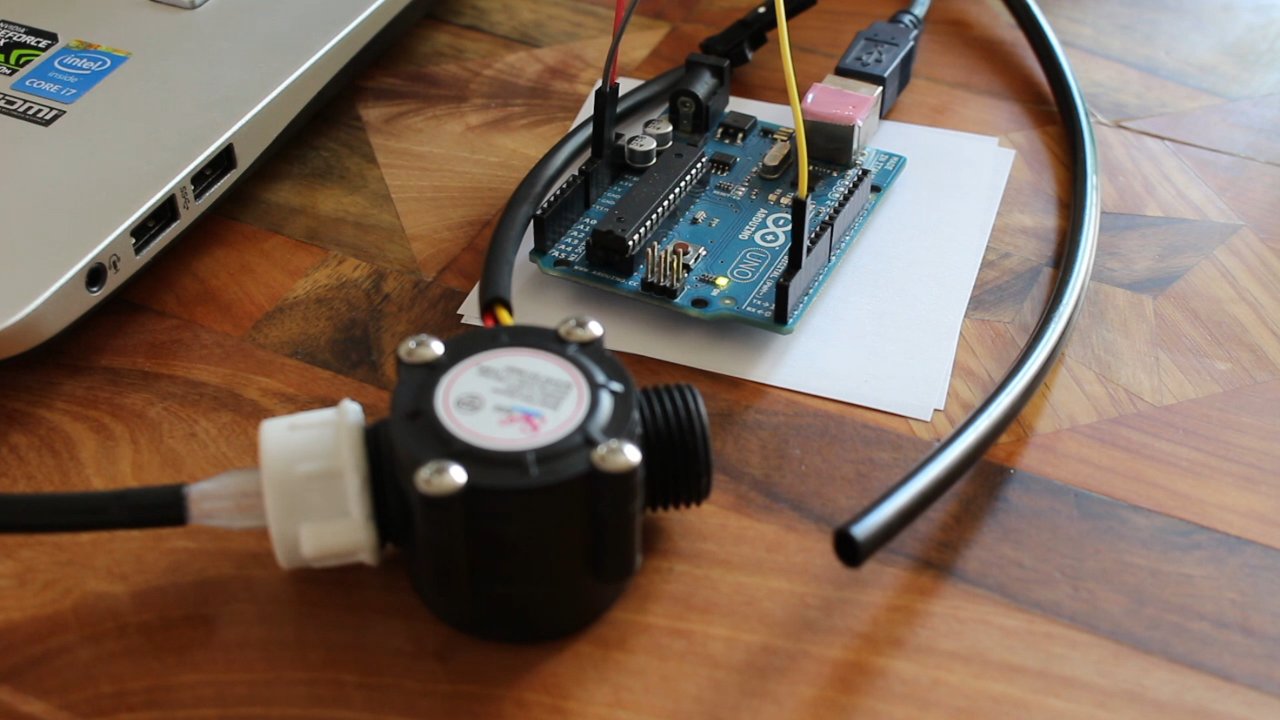
Die einfachste und kostengünstigste Variante für den Einstieg und erste Erfahrungen mit Steppermotoren ist der ULN2003A (EUR 0,25). Im Video sieht man den Anschluss des Motors an einen Arduino. Gesteuert wird der Motor über ein kalibriertes Potentiometer. Zur optischen Anzeige dienen drei farbig unterschiedliche LEDs.
Noch einfacher, aber etwas teurer führt das Testboard mit dem ULN2003A (EUR 2,48), welches oft zusammmen mit dem einfachen Stepper Motor BYJ48 für unter EUR 5,00 zu bekommen ist, zu schnellen Erbebnissen ohne viel Aufwand und Wissen um die Elektronik und die elektrophysikalische Funktionsweise eines Steppermotors. Eine anschauliche Einführung gibt es hier -> http://www.instructables.com/id/BYJ48-Stepper-Motor/
Der Pololu DRV 8835 (EUR 7,12) ist eine H-Brücke für den Antrieb und bidirektionale Kontrolle von entweder 2 brushed DC Motoren oder einem Stepper Motor verwendbar. Hier wird nur letzteres behandelt. Das hier verwendete Breakout Board ist eigentlich für den Raspberry Pi B+ gedacht, wird im Video aber mit einem Arduino UNO verkabelt.
Der Pololu A4988 (EUR 9,30) mit Spannungsregulierung ist ein hervorragend konfigurierbarer Motortreiber für Bipolare Steppermotoren. In meinem Zeitrafferschienen-Projekt (https://blog.georgmill.de/2015/04/28/odroid-c1-with-sanyo-denki-stepper-motor-and-diy-timelapse-rail/) dient er momentan noch als Ansteuerung für einen Sanyo Denki Steppermotor.
In naher Zukunft werde ich den Pololu A4988 aber durch den Silent Step Stick auf Basis des TMC 2100 von Trinamic (EUR 9,95) ersetzen. Dieser Motortreiber verfügt über einen sogenannten stealthChop Modus, der für extrem leisen, nahezu geräuschlosen Lauf des Motors sorgt (leider auf Kosten des Drehmoments). Wenn die Zeitrafferschiene schräg steht, sollte man besser in den spreadCycle Modus wechseln, der für eine hohe Dynamik und Drehmoment sorgt (aber leider auch wieder etwas lauter ist).
Mittlerweile arbeite ich fast ausschließlich mit den Treiben von Trinamic. Zu dem Zeitpunkt, als dieses Video erstellt wurde, kamen diese Treiber allmählich in Mode im Bereich 3D-Druck. Heute (2020) sind sie quasi Standardtreiber für 3D-Drucker und Linearantriebe. Es gibt sie sehr günstig bei Aliexpress (https://de.aliexpress.com/wholesale?catId=0&SearchText=tmc+stepper)