Here is a modification of the first version of my TouchDuinoX(tended): The TouchDuino XL
You can download the sketch from here. To get it running you have to download and install the Centipede Shield library. You do not need the shield itself necessarily, but it make things easier if you don’t want to wire it up manually with 4xMCP23017.
The sketch does not include the code for the analog multiplexer/demultiplexer shield as it makes things too complicated. This is about touch sensing, so we’ll keep it as simple as possible.
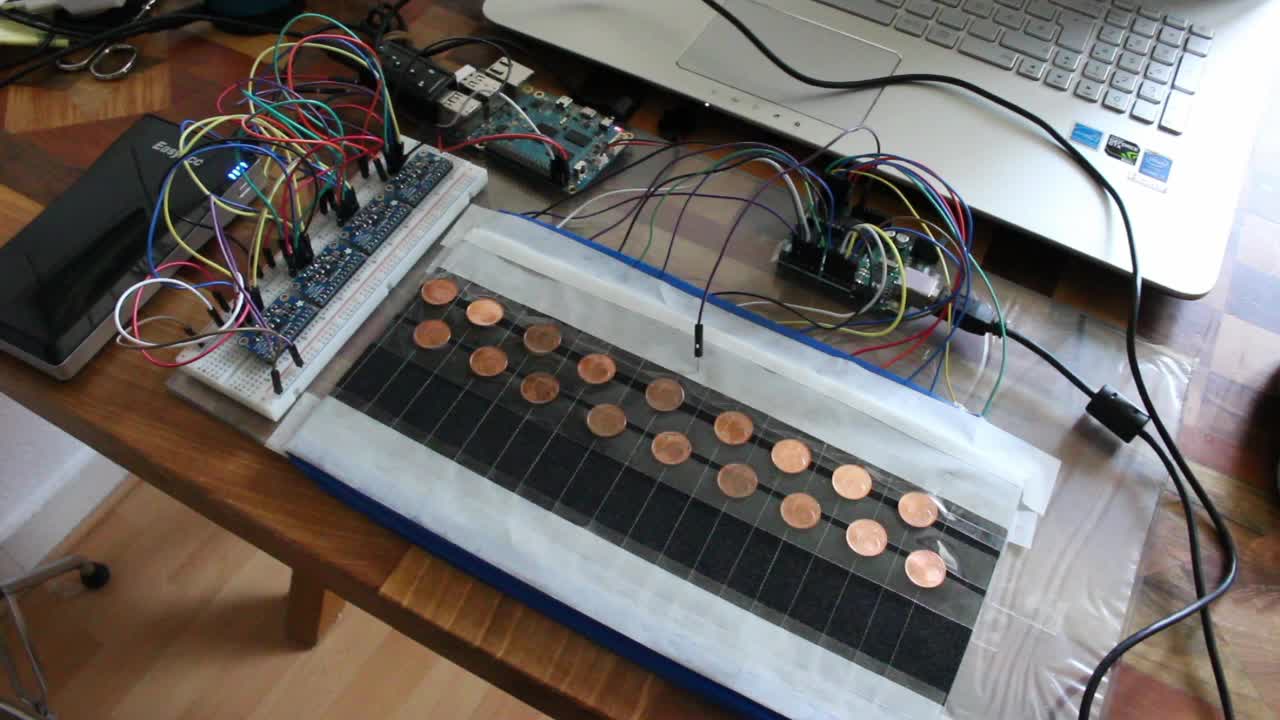
What is that? It is an Arduino UNO connected with 4x 16-bit DIGITAL input/output MCP23017 port expander with interrupt output (http://www.microchip.com/wwwproducts/Devices.aspx?product=MCP23017) via I2C and 3 x High Speed CMOS 16-channel ANALOG Multiplexer/Demultiplexer CD74hc4067 fom Texas Instruments (http://www.ti.com/product/cd74hc4067)
The 3 x CD74hc4067’s come as an ready to use Arduino Shield produced by mayhewlabs.com (http://mayhewlabs.com/products/arduino-mux-shield). My version is an older version. A newer shield is available which is from 2013.
We used the old version because it was part of my old YAAMIDrum project from 2012. So dust was removed from the shield and reactivated to become a part of the new TouchDuino XL.
The special thing about the digital inputs is the fact that they are used to trigger not only bit values (on/off) but they return values from 0-127 that can be used to do several things. E.g. you can use these values to change the volume of a midi tone. Or you can use it to pitchbend the sound. There are a lot of possibilities.
How is this done? We modificated the arduino sketch that can be found on http://playground.arduino.cc/Code/CapacitiveSensor so that it runs on the MCP23017. Fortunately there is a great library (http://macetech.com/Centipede.zip) available from
http://docs.macetech.com/doku.php/centipede_shield where you can buy a ready to use arduino shield to get hings running very quickly.
For german users there is a worth to read discussion in the arduino forums (http://forum.arduino.cc/index.php?topic=170396.0)
We used this library to avoid writing things twice. You can find example code on their website that shows how to use this excellent lib.
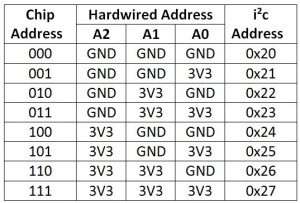
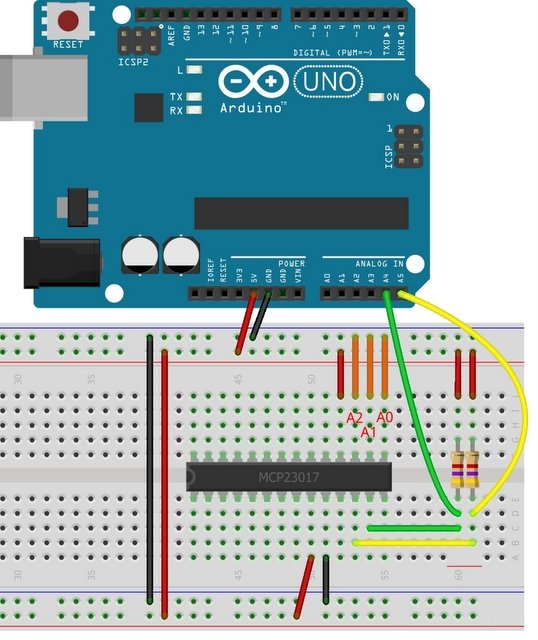
Here is described how one of the 4 chips is connected on the breadboard
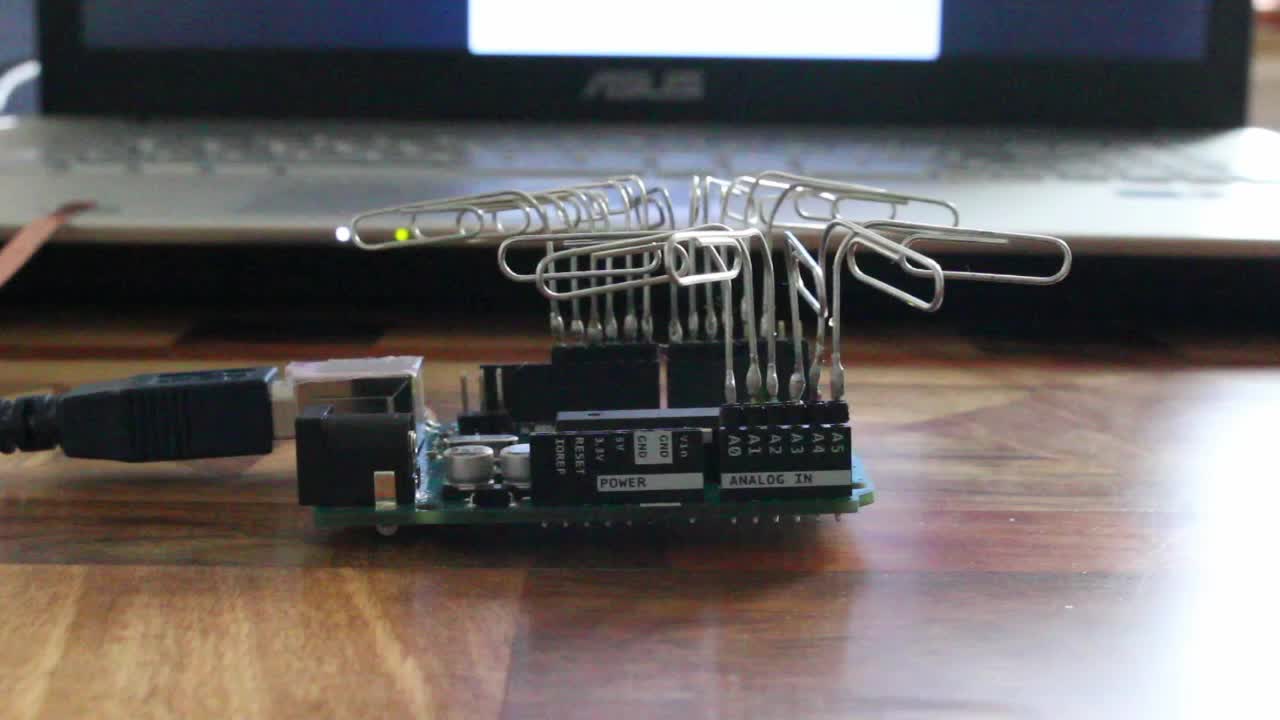
You need to make your fingers wet (with water or best and cheapest with your own saliva). Then put one wire to ground and hold it in one hand. With a wet finger of your other hand touch a paperclip and you can read the measured value from 0-127 on the serial monitor of the Arduino IDE. Set the DEBUG value in the sketch to 1 for debugging and printing these values out to serial line.
Conclusion:
The problem is the internal pullup resistor of the MCP23017. It has 100 kilo ohm, whereas the internall pullup resistors of the arduino are 20 kilo ohm only. So the solution is really simple, but dangerous:
Turn off the internal pullups of the MCP23017, map the values the other way round and you are done. The disadvantage: If you ever connect any active sensor to on of the inputs/paper clips the possibility that you damage the IC or the Arduino is more than high. Be careful.
But now you simply can touch the paper clips to produce midi sounds 🙂
Download the modified version directly from here.